How To Send Encrypted Emails With Postfix
How To Send Encrypted Emails With Postfix
In the previous lesson we installed Postfix and properly configured it with our custom SSL Key and Certificate. We also disabled ipv6 access and mapped an alias for our root user. Now let's test and make sure our emails are working properly.
Use the following command from the Command Line Interface, and replace your_email_address with your email address.
echo "Can you hear me? It's so cold inside." | mail -s "Hello? Is there anybody in there?" your_email_addressNow go check your email. You will probably find it in your Spam folder.

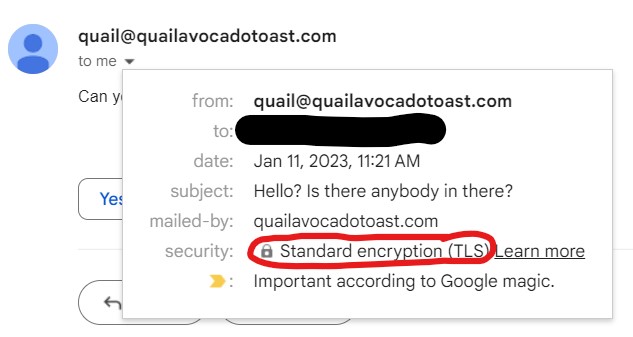
Nice! That worked like a charm. Click into the email so I can show you something.
As you can see, the email successfully went through and it also was sent encrypted using our TLS Key. Great job!
Verifying Emails Sent To root Come To Us
One last thing: because we mapped our email address to be the alias for our root user in the previous lesson, we can also send emails to root. This also ensures that any emails sent to "root" will come to our actual inbox.
To verify this, run the following command from your Command Line Interface.
echo "This is the body of the email" | mail -s "This is the subject line" rootYou don't have to change anything, just hit 'Enter'.

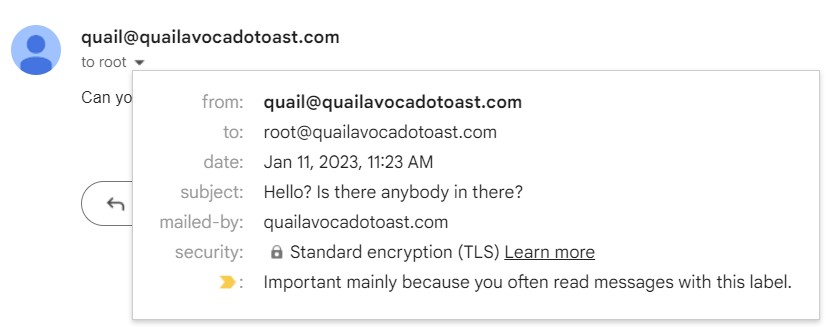
You'll see we have another email from your host. Let's check it out to see something interesting.
Here you can see that this email was addressed to our 'root' user, but it came to us instead. That's the power of alias mapping!
We're done with the testing phase of our STMP server. In the last lesson of this module, we'll make one last change to ensure our emails are encrypted properly.


