How To Harden SSH Access To Your Server
Replacing Passwords With SSH Passphrases
By default, passwords are used for logging into your Virtual Private Server when we use SSH to connect to it. We want to replace that method with our own cryptographic key pair. We will replace our password with a private key, which will be much more difficult to decrypt by an attacker. In this lesson, we'll cover how to generate your own key pair in Windows Powershell and configure your server not to accept passwords for SSH logins.
This first step will be done on your local computer in Windows Powershell, not on your server. So make sure you're not logged into your server via SSH in Windows Powershell.
We're going to generate an RSA key pair with 4096 bits of entropy. Don't worry about the numbers; for now, it will suffice to know that it's a tough nut to crack.
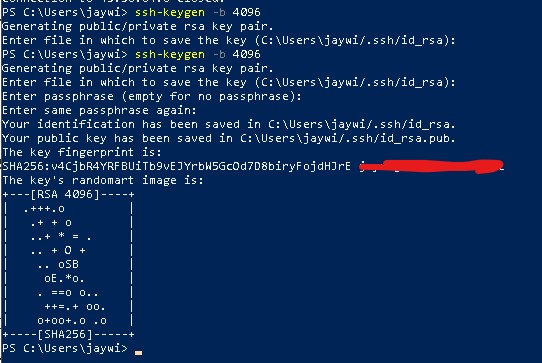
From your Windows Powershell command line, use the following command:
ssh-keygen -b 4096
Hit enter on the following prompt to save your SSH key to its default location (C:/Users/UserName/.ssh).
If you have already generated an SSH key, this will overwrite it. If you already have an SSH key, you can use it if you desire and skip this step. If you've already input the command into Windows Powershell and you're reading this panicking, just hit (CTRL+C) on your keyboard, which will cancel the creation process.
Next, you'll be prompted to enter a passphrase for your key pair. Make sure you enter a strong passphrase; this is the passphrase you will be routinely using to log in to your server from now on.
Uploading Your SSH Keys To Your Server
Now we need to upload that SSH key to our server. To do that from Windows, use the following command:
scp C:\Users\MyUserName\.ssh/id_rsa.pub example_user@192.0.2.1:~/.ssh/authorized_keys
You need to replace MyUserName in the file path with your user name on your local computer. You also need to replace example_user with the user name you just created on your server and the IP address following example_user with the IP address of your server (which you can get from your Cloud Console Page on Linode).
An easy way to get the file path is to open up a file explorer (Windows Key + E), navigate to your .ssh folder and right click the 'id_rsa.pub' file and select 'Properties' at the bottom of the right-click menu. You'll be able to see the full file path and you can simply copy it and replace the above file path with the correct one.
After entering that command properly, you'll be prompted asking if you're sure you want to continue. Type 'yes' and hit enter.
As you connect to your server, you'll need to input your user's password that you just created when we were on our server.
Afterwards, you'll see your public key was successfully uploaded to your server.
Logging Into Your Server With Your SSH Passphrase
Now we can log back into our server using our new SSH key and passphrase, and we'll never need to use our password again.
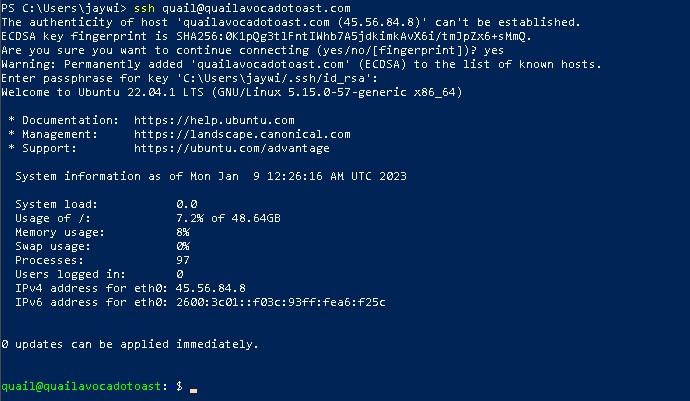
This is a fun time to tell you that you don't need to use your IP address anymore either. Because you set an 'A' record for your domain when we registered it, you can use your domain name. My domain name was quailavocadotoast.com so I can just use that instead of my IP address.
Note: This will require you to confirm another ECDSA fingerprint when you try to access your server since the hash is different. Just type 'yes' when prompted as in the example below.
Use the following command, and replace example_user with your limited username and domain_name with your domain name (or server IP address).
ssh example_user@domain_nameYou'll be prompted to enter your PASSPHRASE this time, not your password. This will be the passphrase you just set up for your RSA keypair.

Configuring Our SSH Daemon
Now let's make a couple quick changes to our server configuration so only we can log in and only through the method we just completed.
sudo nano /etc/ssh/sshd_config
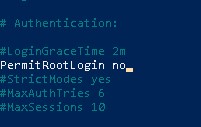
This will open your SSH Daemon configuration file in Nano. Press (CTRL+R) to search and type "PermitRootLogin" and hit enter.
Change this value from 'yes' to 'no'.
Search for "PasswordAuthentication" and uncomment this line by deleting the # at the beginning (if it's commented) and change this value from 'yes' to 'no'.
Finally, search for "AddressFamily". Delete the "#" in front of it and set it's value to 'inet'.
Save this file by hitting "CTRL+X" and typing "y" then hitting enter.
Now we want to restart our SSHD services with the following line:
sudo systemctl restart sshd
Great job! We've not hardened our SSH access and made our server very difficult to penetrate. Now let's install Fail2Ban to give us another layer of security.


