How to Qualify for the LayerZero Labs ZRO Airdrop
After the massive Arbitrum $ARB Airdrop win, we need to prioritize qualifying for upcoming Airdrops. Not only are they big profits for almost no investment, but Airdrop Hunting positions you to receive multiple Airdrops.
Let’s qualify for the next big airdrop: LayerZero Labs $ZRO.
WHAT IS LAYERZERO?
LayerZero is an innovative omnichain protocol that bridges EVM chains and unifies liquidity pools. Using user-friendly on-chain endpoints, LayerZero enables seamless cross-chain communication powered by oracles and relayers.
Simply put, LayerZero aims to be the best technology to send messages across chains. The use cases are endless, with a swift and efficient communication mechanism cross-chain.
For example, if you hold assets on one chain, LayerZero could allow you to participate in a liquidity pool, trade, or staking event on another chain without having the assets on that chain.
We could say goodbye to bridging all together, and one could simply hold their funds on the most secure chain while engaging with whatever chain they like.
You can learn more about Layer Zero on their website.
WHOSE INVESTED?
Big players are invested in LayerZero Labs - we’ve got PayPal, Binance, Polygon, Coinbase, a16z, and Sequoia.
They should support Ethereum, Polygon, Binance Smart Chain, Arbitrum, and more upon launch.
HOW TO QUALIFY
While Layer Zero has yet to announce an Airdrop, every major token has done an Airdrop, and the ZRO token is confirmed in Layer Zero's whitepaper. What follows is my personal strategy to maximize my odds of qualifying.
Strategy #1: Stargate Finance Bridge
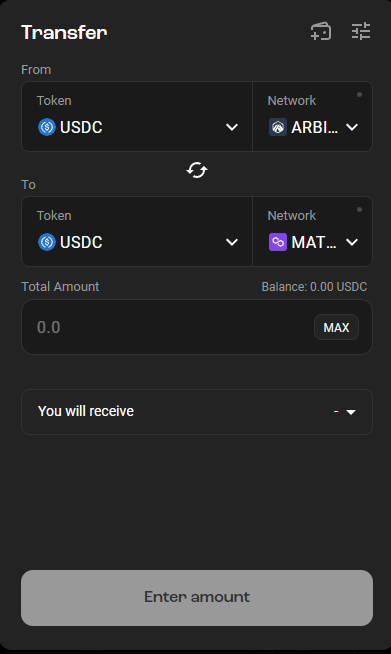
- Visit https://stargate.finance/transfer
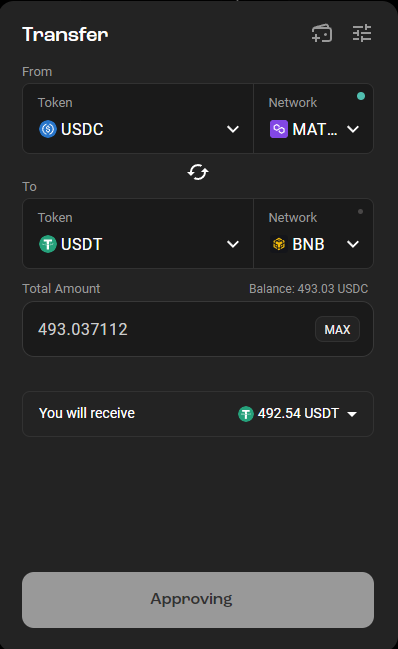
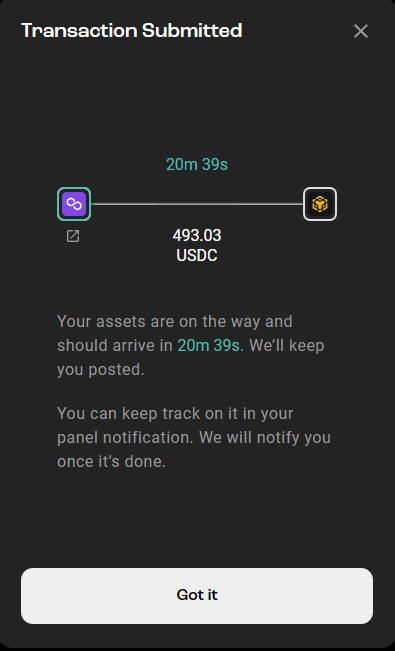
- Bridge at least 500 $USDC (>$1000 recommended for the largest drop) across multiple chains using the following hops:
- Bridge USDC from Arbitrum to Polygon
- Bridge USDC from Polygon to USDT on Binance Smart Chain
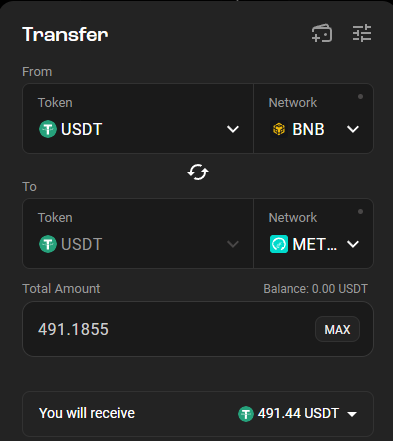
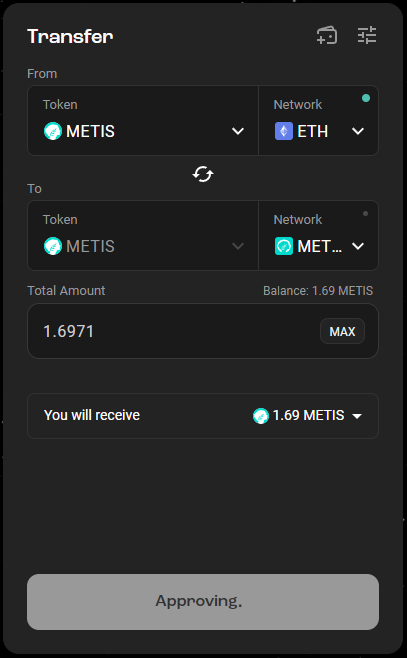
- Bridge USDT from Binance Smart Chain to USDT on Metis
- You’ll need some METIS in your Metis wallet to bridge out. Purchase some METIS on KuCoin/Coinbase, withdraw it into your ETH Mainnet wallet, and use Stargate to bridge that ETH METIS onto the Metis chain.
- Bridge USDT from Metis to USDT on Avalanche C-Chain
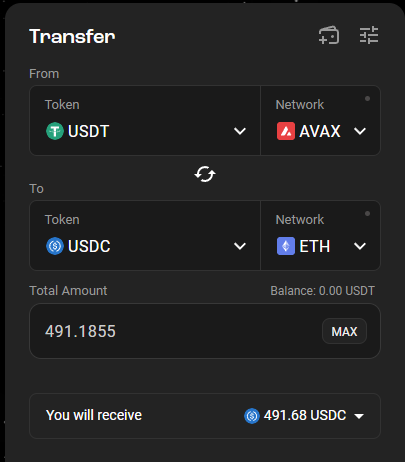
- Bridge USDT from Avalanche C-Chain to USDC on Ethereum Mainnet
- You’ll need about $30 of AVAX to cover the gas fee; because you’re transferring to ETH Mainnet (expensive gas), you pay the fee on the AVAX side.
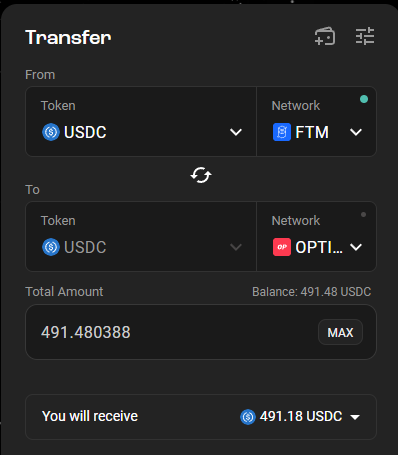
- Bridge USDC from Ethereum Mainnet to USDC on Fantom
- Bridge USDC from Fantom to USDC on Optimism
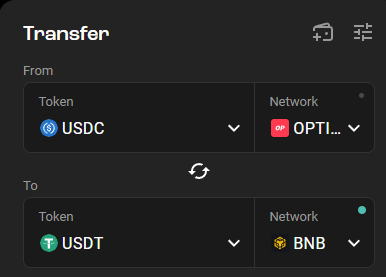
- Finally, bridge USDC from Optimism to USDT on Binance Smart Chain
Ensure you have enough base currency in each wallet to cover the gas fee for bridges. (eg. ETH for Arbitrum, Optimism, Ethereum, MATIC for Polygon, AVAX for Avalanche…)
I would do this first: Go to ByBit, and make Spot Purchases for all the base currencies you’ll need. You’ll need about $30 worth of AVAX to bridge from AVAX to ETH; because of ETH’s high fees, you pay the fee on the AVAX side.
For all the other chains, transactions are less than $1. If I were you, I would buy $10-20 worth of all the base currencies so that in the future, when we look for Airdrops, Investment Opportunities, or Trades on other chains, your wallets will be ready to go. Remember, Arbitrum, Optimism, and ETH all use ETH as their Base Currency.
The cheapest way to grab these currencies is ByBit’s Spot Market; there are zero fees for Spot Trading. Sign up with my link to save 20% on your Maker Fees and up to $30,000 in sign-up bonuses.
Note: ByBit does not support METIS. You can purchase METIS from KuCoin, or Coinbase, or you can swap WETH for it on Uniswap.
I purchased METIS on KuCoin, withdrew it to my ETH Mainnet Wallet, and used Stargate itself to transfer the METIS to the METIS network. It took about ten minutes; the only unpleasant thing was the ETH gas fee.
Once you’re all done, transfer the USDC leftover on Optimism to USDT on Binance Smart Chain. We’ll use these funds for our third strategy. See screenshot.
Strategy #2 Stake STG and Join Stargate DAO
For this strategy, we will purchase some STG tokens, stake them on Stargate Finance to get veSTG, and use that veSTG to vote on Governance Proposals for Stargate Finance.
So, we should have all our USDT from Strategy #1 sitting in our Binance Smart Chain Wallet. You can take a portion of that or use a different set of funds for this strategy.
If you’re using some of the funds from our previous strategy, bridge that amount (I would recommend at least $50) to USDC on the Arbitrum Network.
Once you have some USDC on Arbitrum, follow these steps:
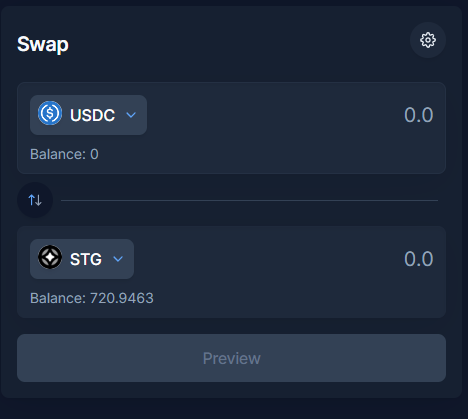
- Go to Balancer and swap your USDC for STG.
- https://app.balancer.fi/#/arbitrum/swap (Select Swap, and swap USDC for STG [see screenshot below])
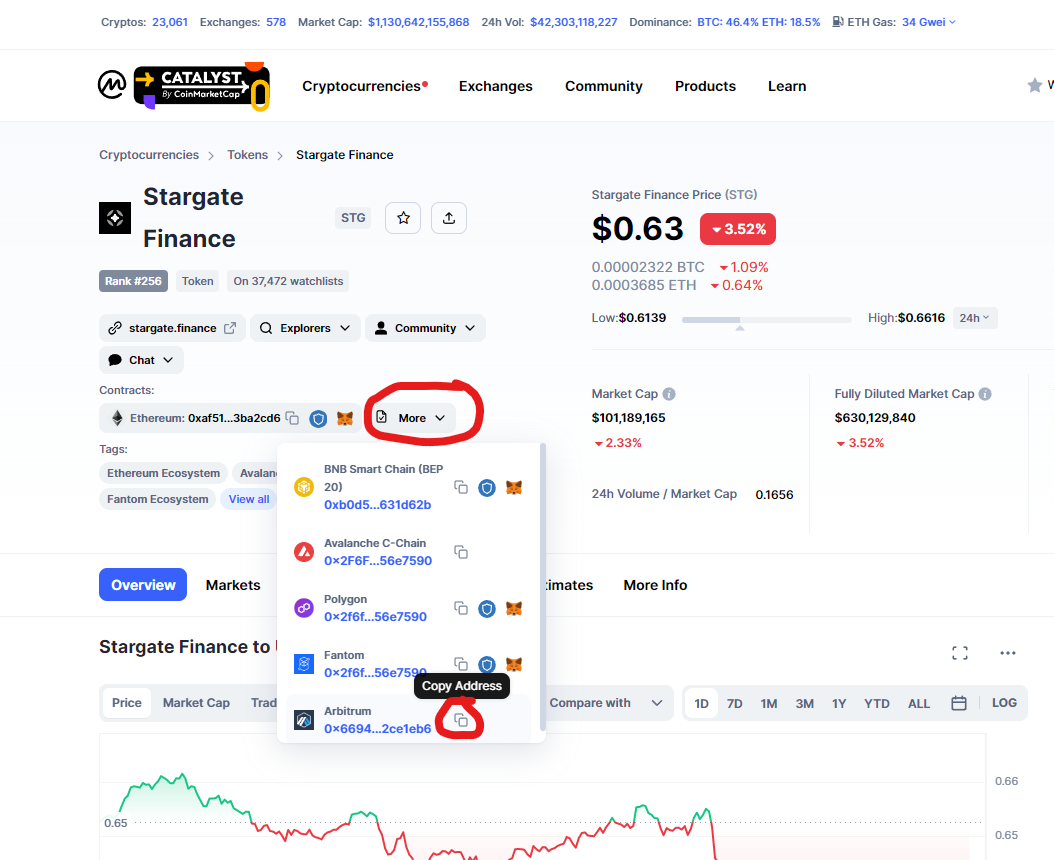
- To get the Stargate Contract address, visit their listing on https://coinmarketcap.com/currencies/stargate-finance/ and copy the contract address. Click the drop-down and select the Arbitrum Contract address, not the Ethereum one. (See screenshot)
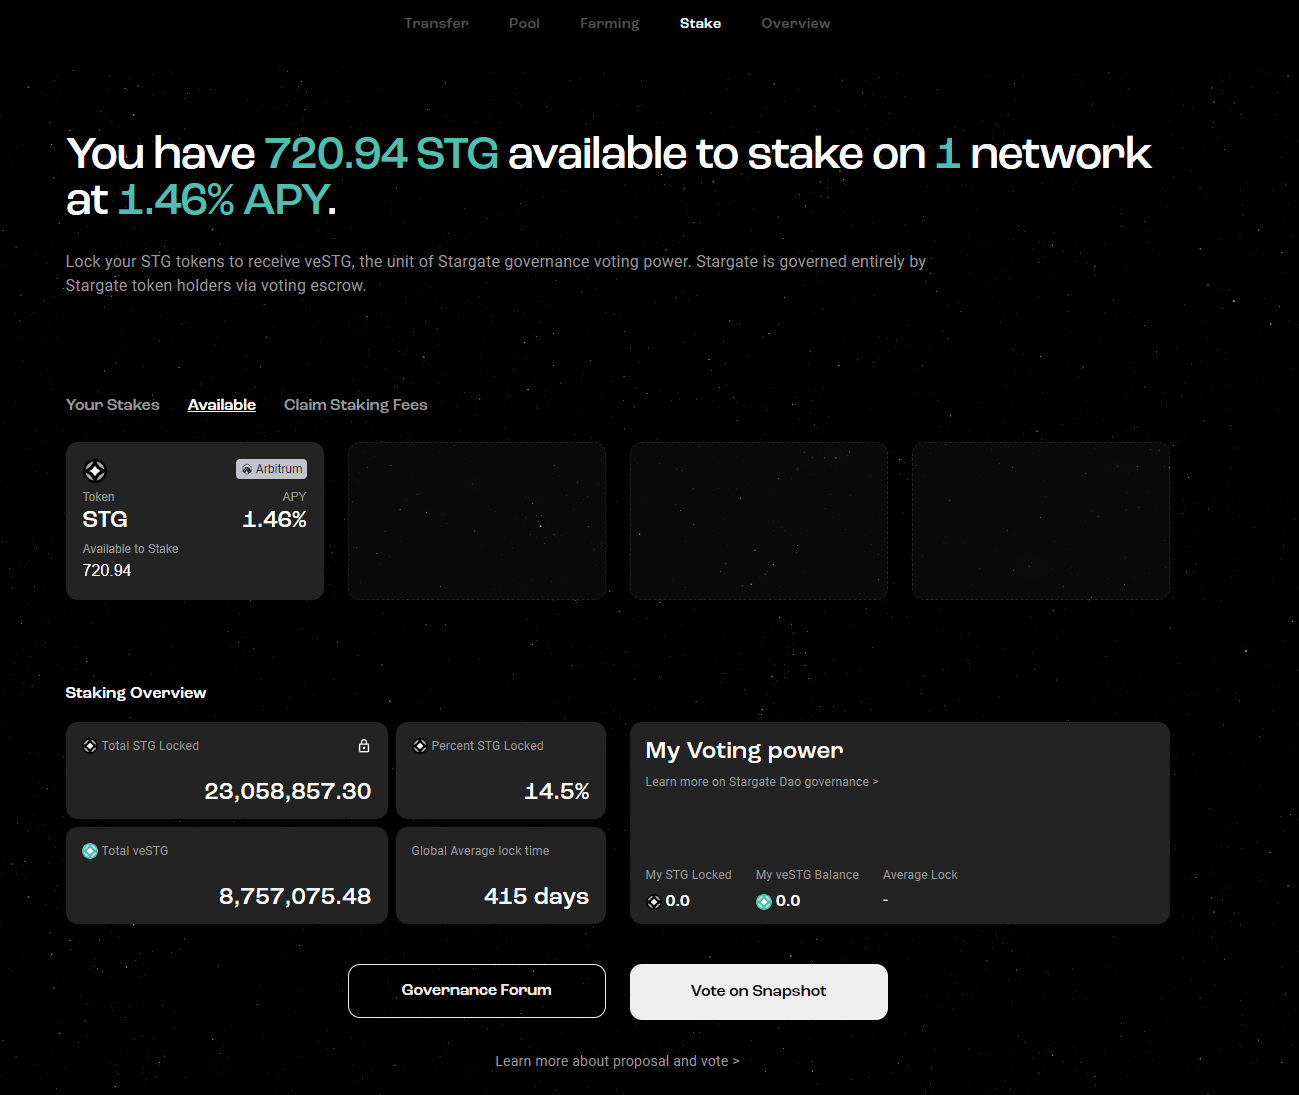
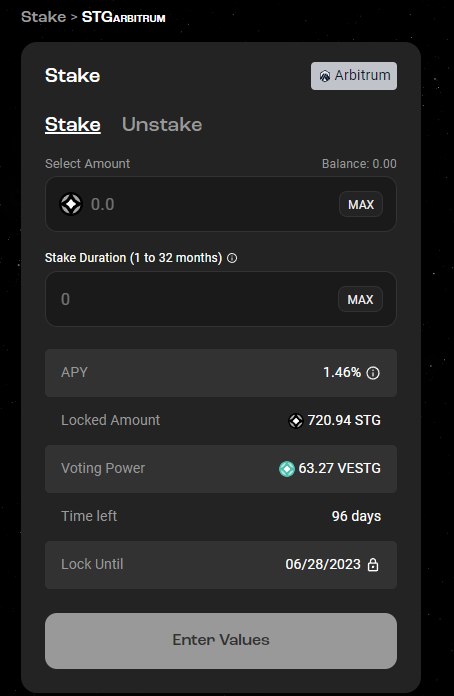
- Now head back to Stargate Finance https://stargate.finance/stake/ARBITRUM
- Connect your Arbitrum wallet, and select the staking option (see screenshot)
- Select ‘Max’ and select a Staking Period that you like (I chose three months)
- Stake your tokens.
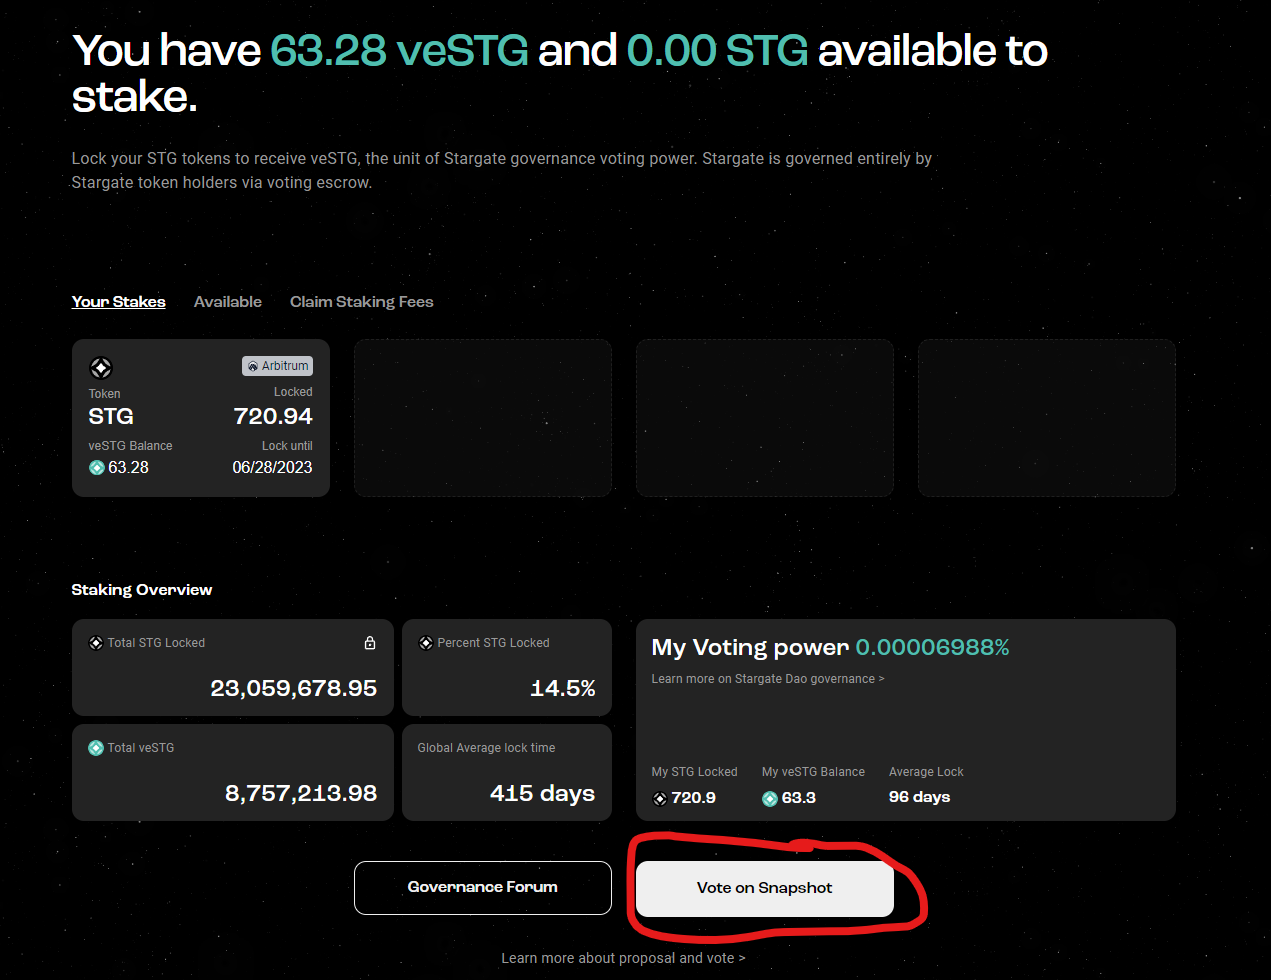
- Now go back to the main Staking Page and click on ‘Vote on Snapshot’ at the bottom (see screenshot)
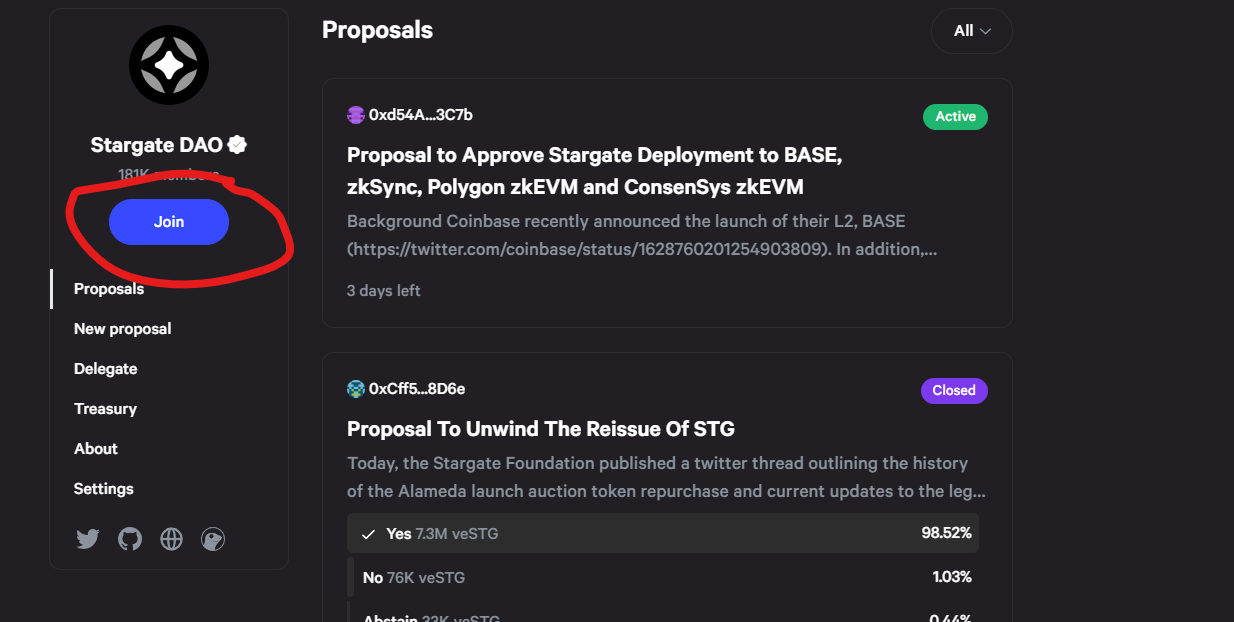
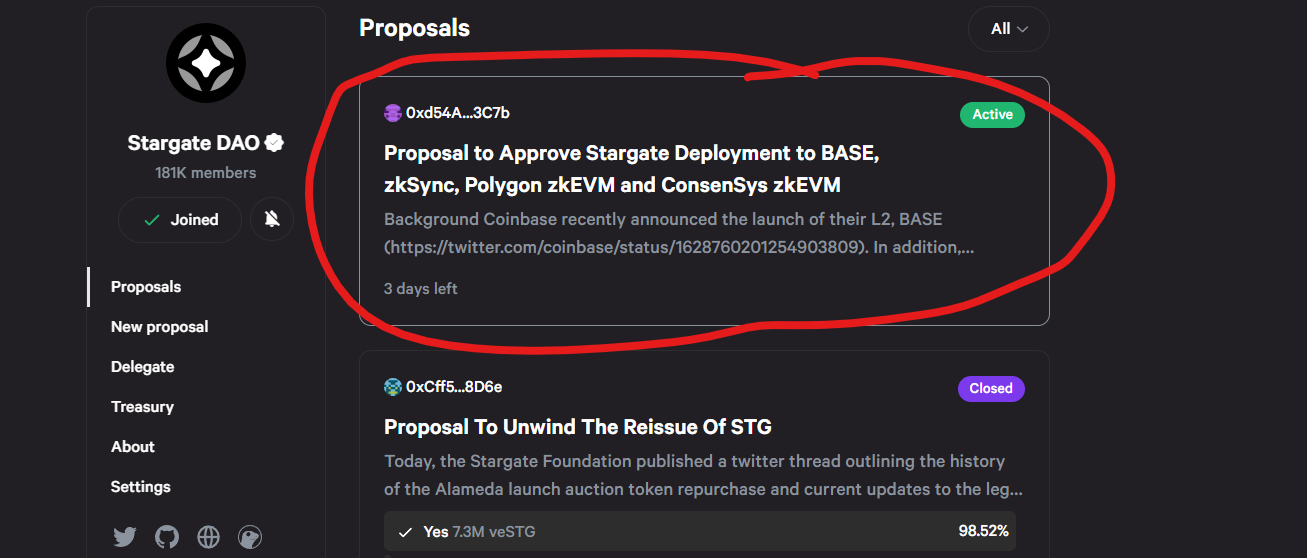
- Join the Stargate DAO (see screenshot)
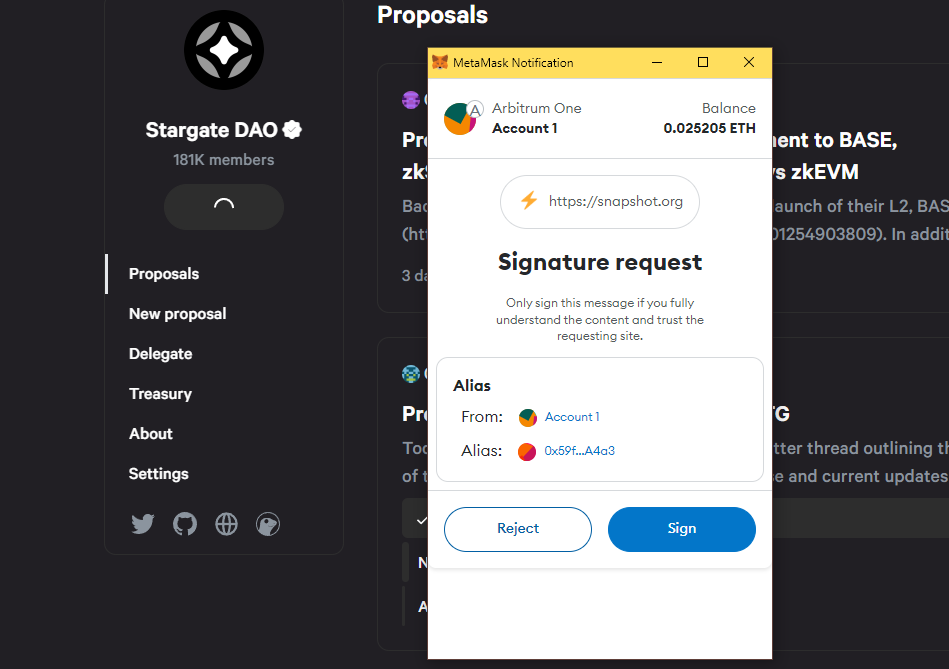
- You’ll need to click Join again to sign a message
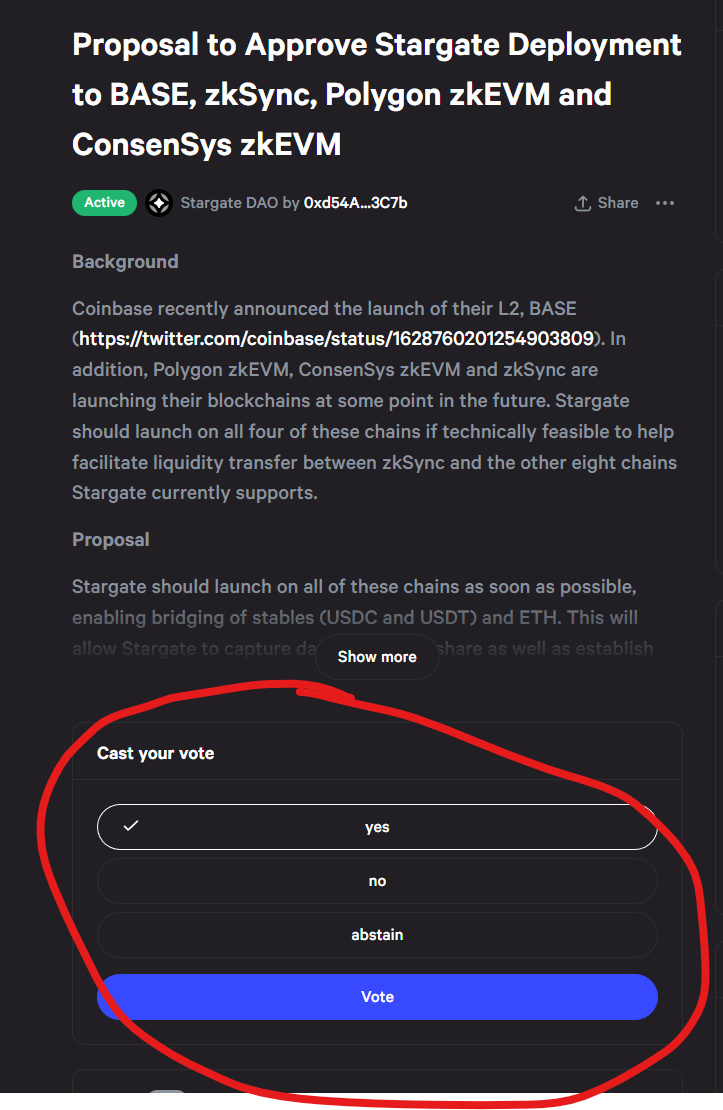
- Now that you’ve joined the DAO click on an Active Proposal and cast your vote.
That’s it for this strategy. You have now purchased some $STG, staked them, become a member of the Stargate DAO, and voted on a proposal. If that doesn’t qualify you, I don’t know what will.
Oh, but I do; it’s our next strategy!
Strategy #3 Bridge Funds Through LayerZero’s Harmony Bridge
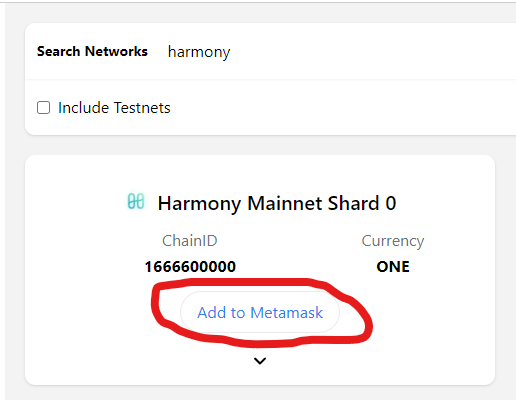
With our next strategy, we will use LayerZero’s Harmony Bridge directly. To prepare, make sure to add the Harmony Mainnet to your MetaMask wallet by clicking ‘Add Wallet’ on ChainList.
Next, you will need some ONE tokens in that wallet to cover gas fees. So purchase some ONE from ByBit. Again, I would buy $10-20 worth to cover future gas expenses, so you’re prepared.
Withdraw those ONE tokens into your Harmony Wallet.
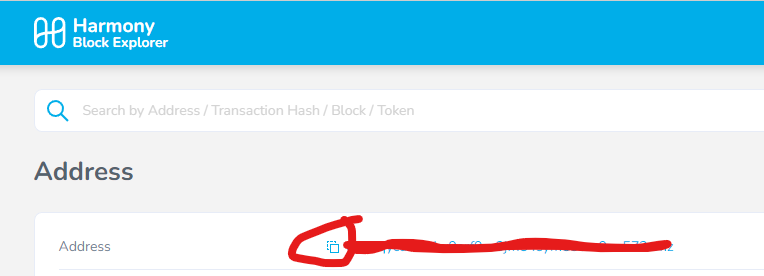
The default wallet address in MetaMask is not your Harmony Address. To see your actual Harmony Wallet Address click the hamburger menu and select ‘View Account in explorer’ (see screenshot). You’ll see your wallet address from the block explorer, and you can copy it. (Screenshot)
Once they’re in there, follow the steps below.
- Visit https://layerzero.bridge.harmony.one
- Switch your MetaMask to Binance Smart Chain.
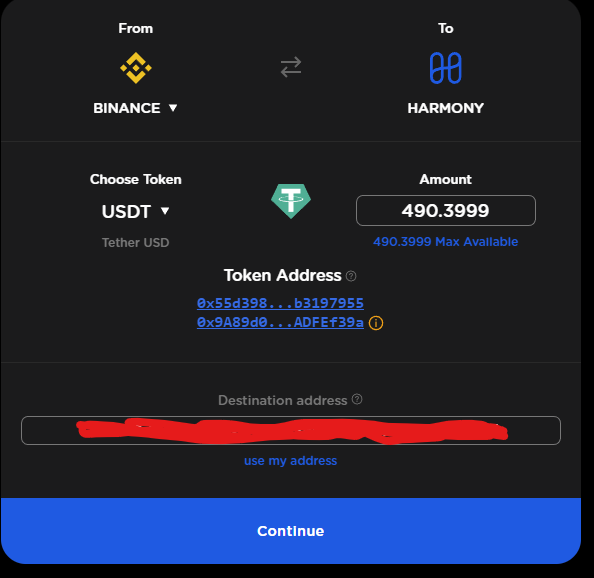
- Bridge USDT from Binance Smart Chain to Harmony (see screenshot below)
- You’ll be asked to complete TWO confirmations.
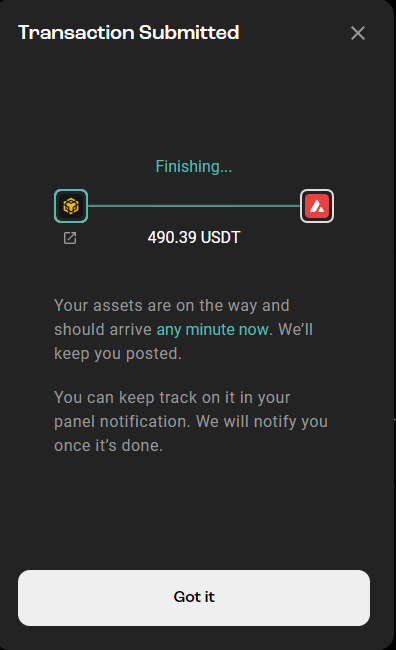
- After a few minutes, you’ll have bscUSDT in your Harmony wallet.
- Now, just bridge it back. Switch the FROM chain to Harmony and bridge the USDT back to your BSC wallet. (see screenshot)
- Repeat several times if you like to increase your odds.
Keep those USDT coins in your BSC wallet; we’ll use them in the following strategy.
A Quick Aside...
Did you know I used to be the worst cryptocurrency trader? Then I discovered a simple secret that allows me to trade fulltime, making six figures a year from the cryptocurrency markets.
I've spent the last five years teaching this secret to thousands of students around the world, and our testimonials speak for themselves.
We're now allowing new recruits into our private group, but we don't have very many spots left.
If you're tired of navigating the markets alone, and want to work with a team of professionals who deliver results in a no-nonsense way, join Cracking Cryptocurrency.
And now, back to the Airdrop Hunting...
Strategy #4 Bridge Funds through the Bitcoin Bridge
The Bitcoin Bridge utilizes LayerZero’s OFT Standard to bridge a wrapped form of Bitcoin, BTC.b.
You should have your USDT in your Binance Smart Chain Wallet from the last step, so follow along:
- Use Stargate Finance Bridge to Bridge that USDT to USDC on Avalanche.
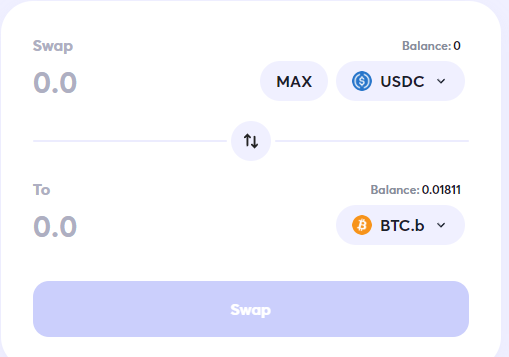
- On Avalanche, swap your USDC into BTC.b on Trader Joe. https://traderjoexyz.com/avalanche/trade
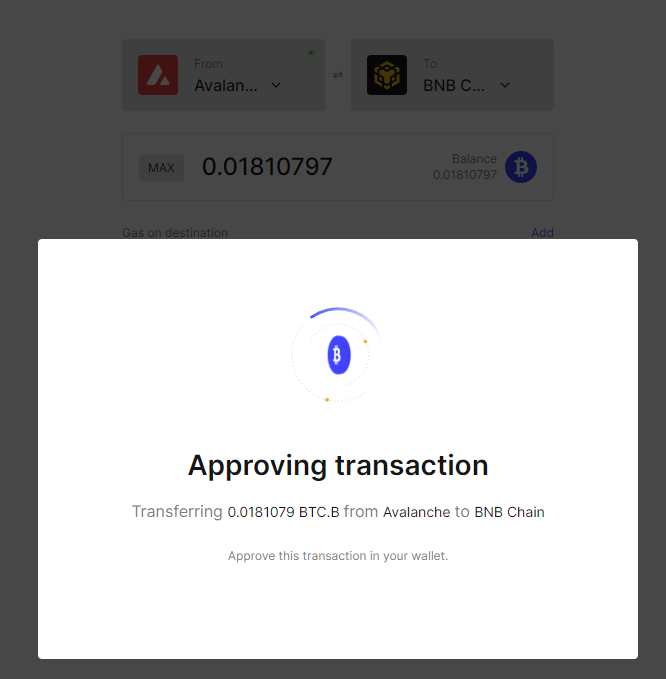
- Use the Bitcoin Bridge to bridge your funds from one EVM Compatible Wallet to another. https://bitcoinbridge.network/bridge
- You can bridge AVAX -> BSC, BSC -> Polygon, Polygon -> Arbitrum, Arbitrum -> Optimism, and Optimism -> Avalanche.
We will want to end back at Avalanche, so we can go back to TraderJoe, and swap your BTC.b back into USDC for our next strategy.
Strategy #5: Bridge Funds Using PancakeSwap Bridge
LayerZero also powers PancakeSwap’s bridge. Let’s rinse and repeat our previous strategies through this bridge to qualify for the Airdrop.
- Go to https://bridge.pancakeswap.finance/
- Connect your wallet and transfer your funds between EVM-compatible chains
- Avalanche -> BSC, BSC -> Arbitrum, Arbitrum -> Optimism, Optimism -> FTM, FTM -> Polygon, Polygon -> BSC.
We’ll want to end back up in Binance Smart Chain when we’re all done.
Strategy #6: Bridge Funds through the Aptos Bridge
We’ll be bridging funds from Binance Smart Chain to Aptos for this strategy.
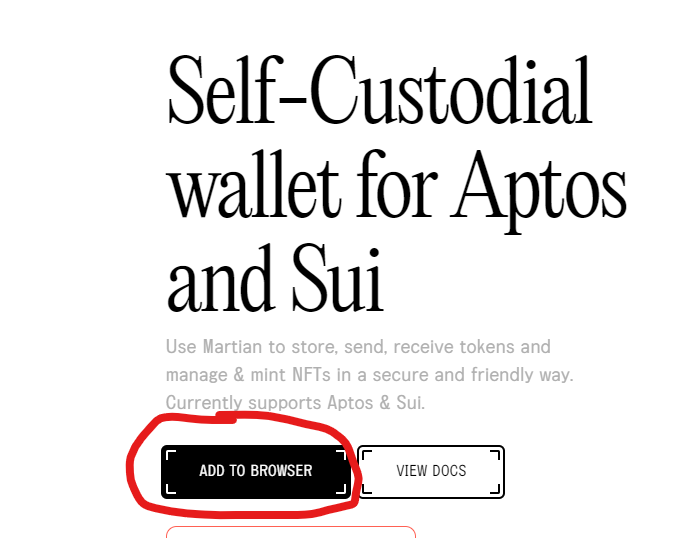
For this, you’ll need an Aptos wallet. I recommend Martian Wallet. Here is their official website, and you can add it as a browser extension from this website: https://martianwallet.xyz/
Grab some APT from ByBit, and withdraw it to your Martian Wallet once it is set up. Remember to store your Seed Phrase somewhere safe and offline (thumb drive, offline hard drive, written piece of paper covered in laminate hidden under your floorboard).
Ok, with your USDT in your Binance Smart Chain Wallet and some APT in your Martian Wallet, follow these steps:
- Visit https://theaptosbridge.com/
- Click ‘Connect Wallet’ in the upper right corner
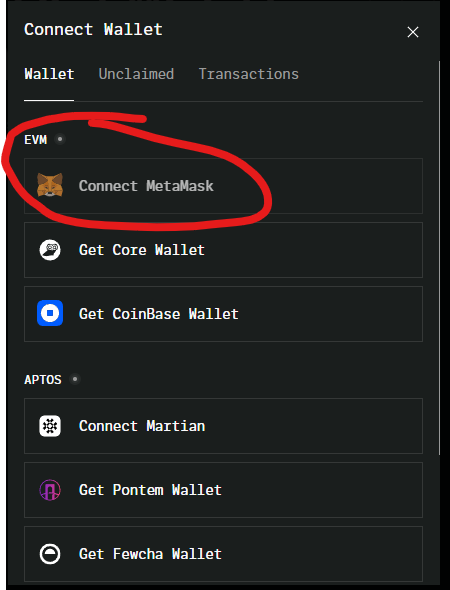
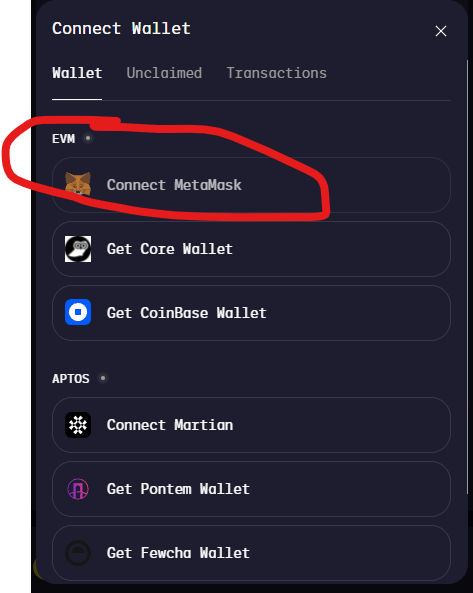
- You’ll need to connect both your BSC MetaMask and your Martian Wallet, so first connect your MetaMask (see screenshot below)
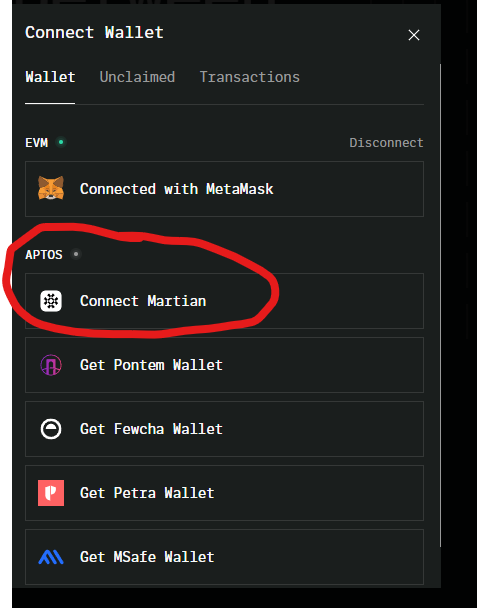
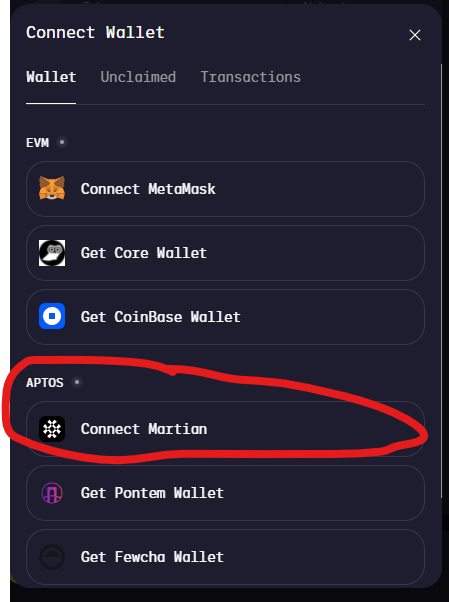
- Next, connect your Martian Wallet (see screenshot below)
- With both wallets connected, click ‘Go To Transfer’
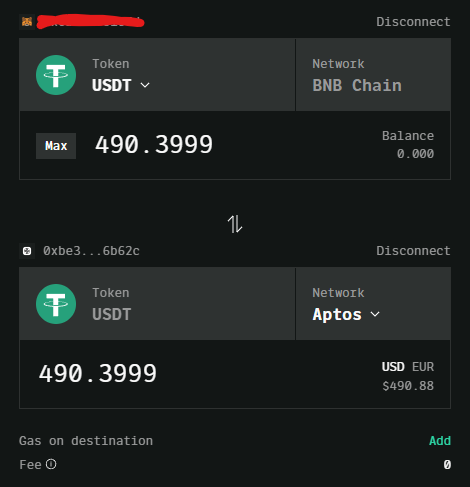
- On the next screen, make sure USDT from BNB chain is at the top and USDT and Aptos is at the bottom.
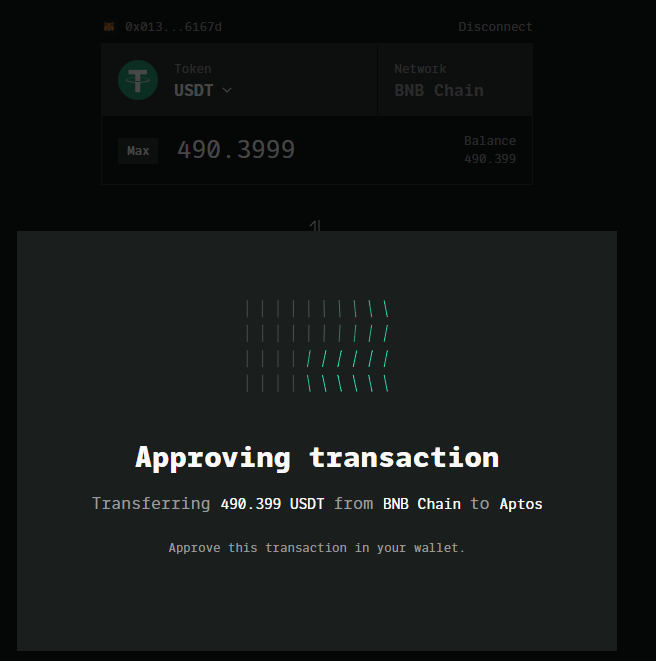
- Select ‘Max’ and click ‘Transfer’
- The funds should appear in your APTOS wallet within a few minutes.
Great, you’ve completed this section of the strategy. Hold onto the funds in your APTOS wallet; you’ll need them for the next step.
Strategy #7 Bridge Funds with LayerZero’s Liquid Swap
For this strategy, we’ll be bridging the funds OUT of our Aptos wallet to our Polygon wallet.
IMPORTANT: This bridge transfer may take up to three days. That’s why I’ve saved this for the later part of the strategy guide. Ensure you do not need these funds immediately because this bridging process is slow.
With USDT in your Aptos wallet, follow these steps:
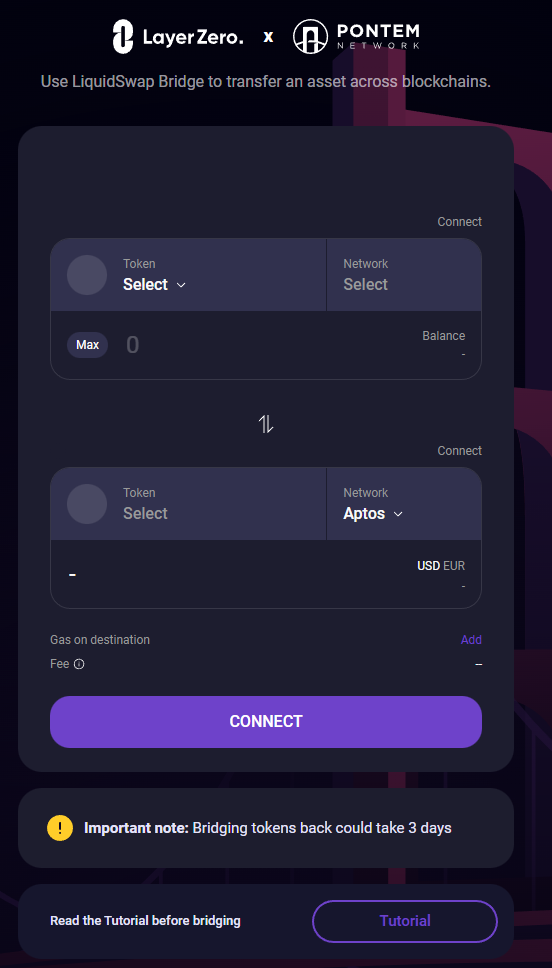
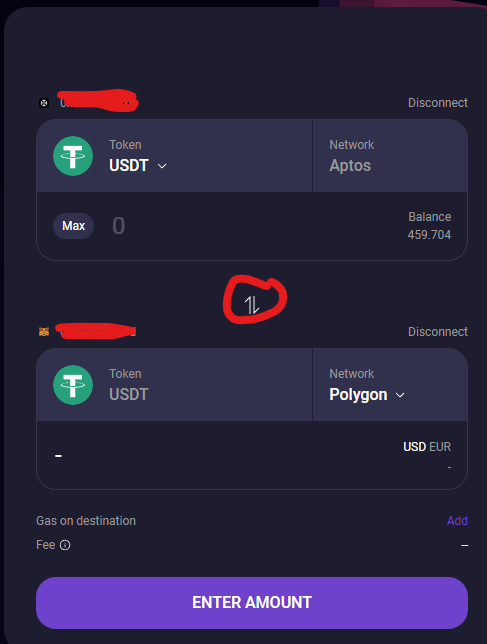
- Visit https://bridge.liquidswap.com/
- Connect your MetaMask (Polygon Network) and Martian Wallet
- Click the ‘switch’ button in the middle (see screenshot below) to change the FROM to Aptos and the TO to MetaMask
- Make sure the ‘Polygon’ network is selected in the TO section
- Hit ‘Max’ and ‘Transfer’
- Note: This transfer may take up to three days.
Strategy #8: Bridge ETH to Goerli Using Testnet Bridge
Testnet Bridge is a bridge to transfer ETH from the Ethereum Mainnet into GoerliETH on the Goerli Testnet. You can bridge the other way as well.
For this strategy, you’ll need a nominal amount of ETH in your ETH Mainnet wallet and enough ETH to cover gas.
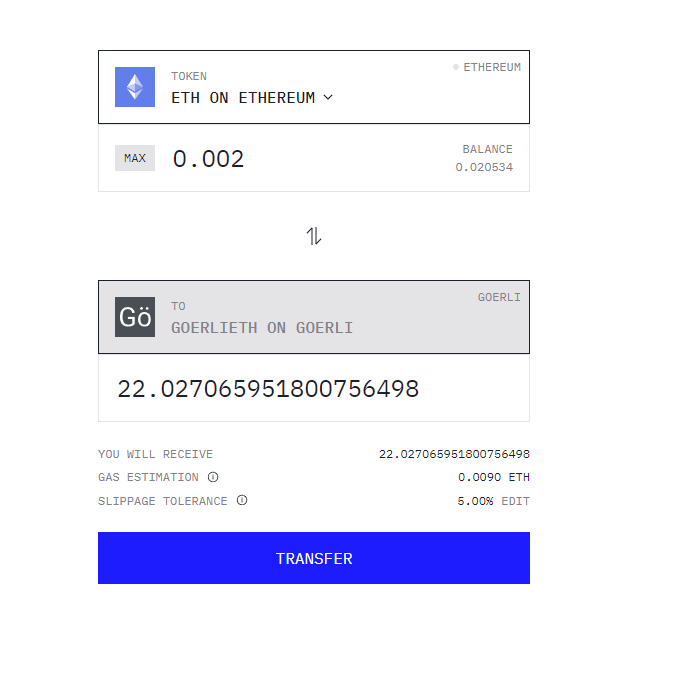
- Visit https://testnetbridge.com/
- Connect your wallet and transfer a nominal amount of ETH to GoerliETH
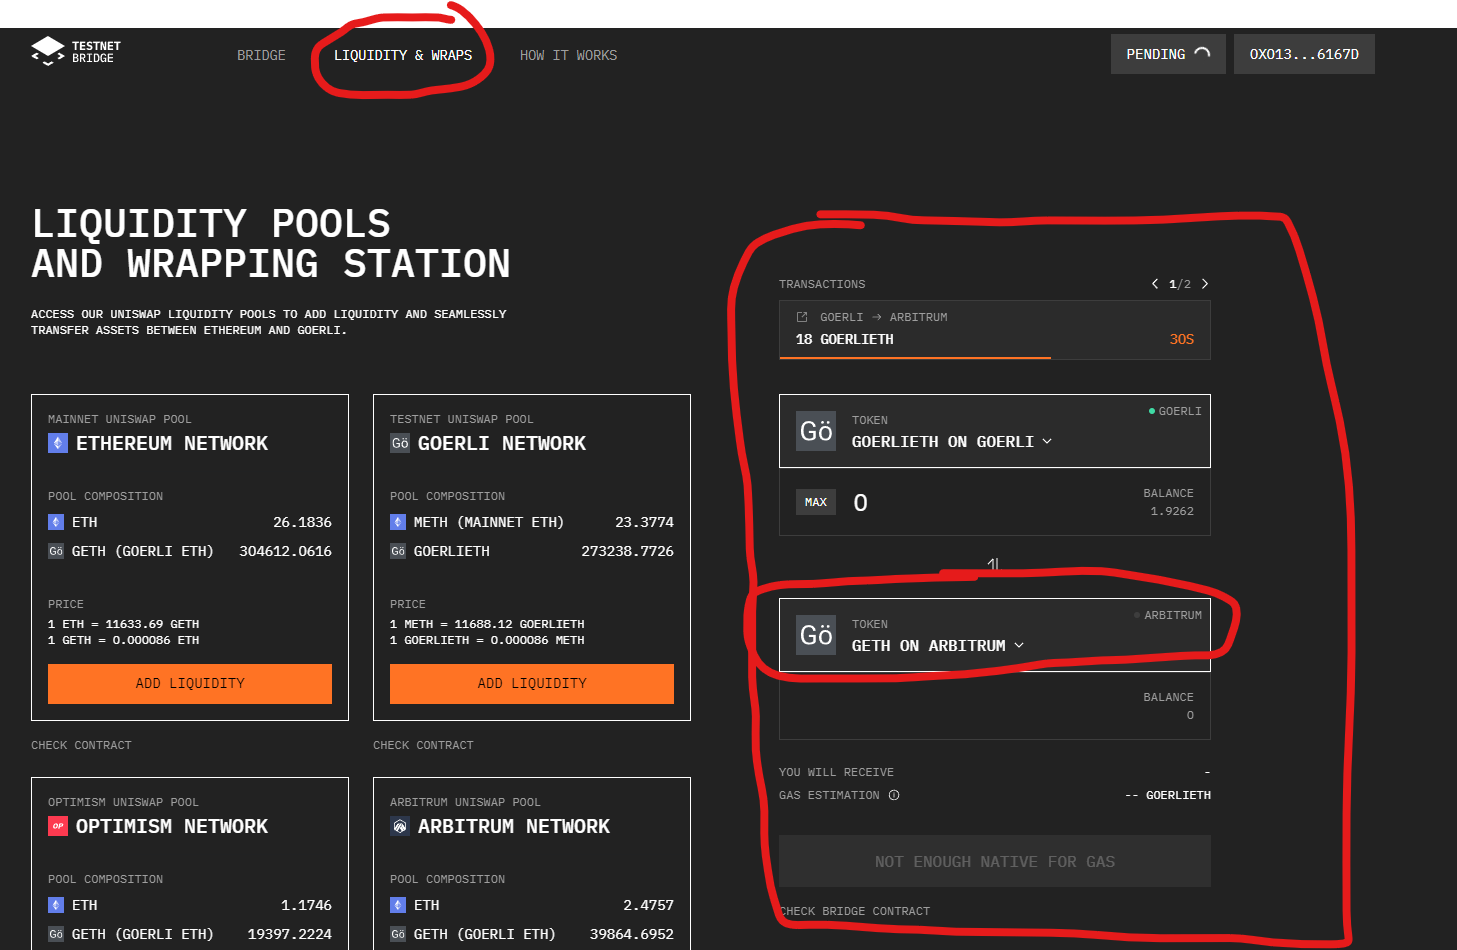
- Once it’s confirmed, you likely won’t have enough GoerliETH to afford the gas to bridge it back to ETH Mainnet, so to get your ETH back, do this instead:
- Click ‘Liquidity & Wraps’ at the top, and bridge your GoerliETH to GETH on Arbitrum.
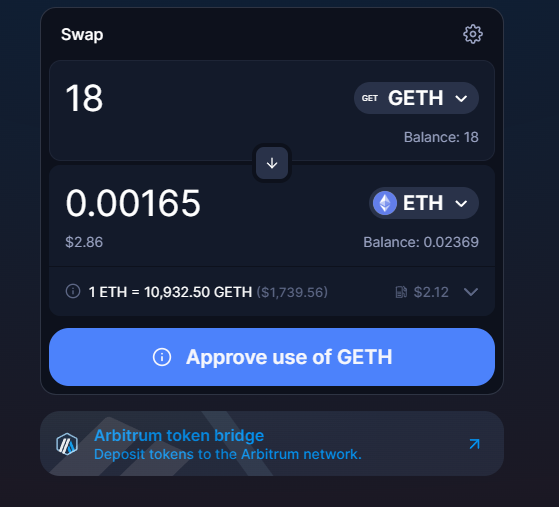
- Once it’s there, you can swap it back into ETH on Uniswap. https://app.uniswap.org/#/swap?outputCurrency=0xdd69db25f6d620a7bad3023c5d32761d353d3de9
Strategy #9: Bridge Testnet USDC
For this strategy, we will bridge USDC on Avalanche’s Testnet (Fuji) to the Goerli ETH Testnet. This is Circle’s Bridge powered by LayerZero.
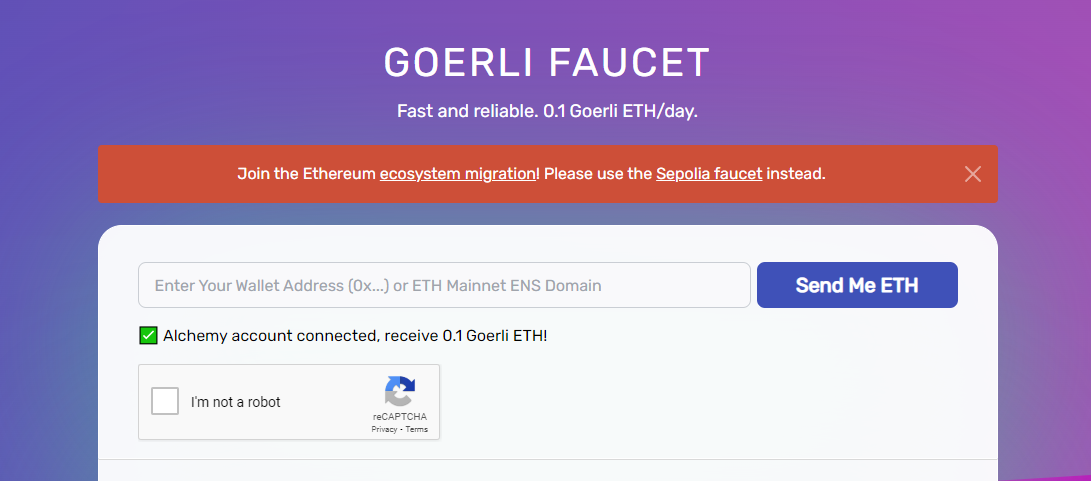
- Make sure you have some Goerli ETH to pay for gas fees. You can get 0.1 GoerliETH daily at https://goerlifaucet.com by signing up for a free Alchemy account. (You should have an Alchemy account.)
- Visit Avalanche’s Testnet Faucet https://faucet.avax.network/
- Add the Fuji testnet to your MetaMask, and paste your public address to get testnet Avax.
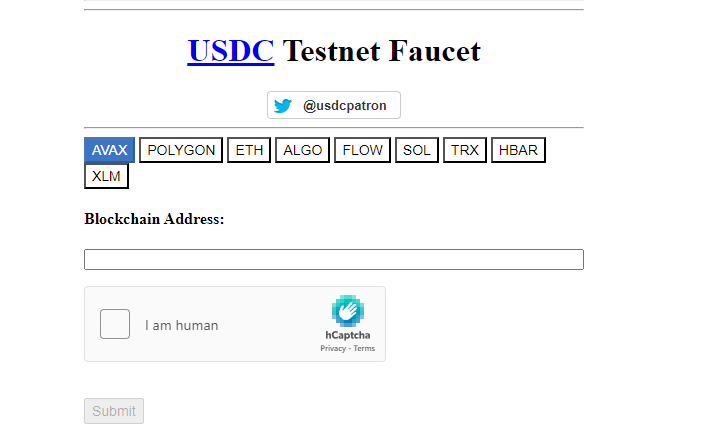
- Visit the USDC faucet https://usdcfaucet.com/ and get some USDC on AVAX Testnet (I know, the website looks janky, but it works.)
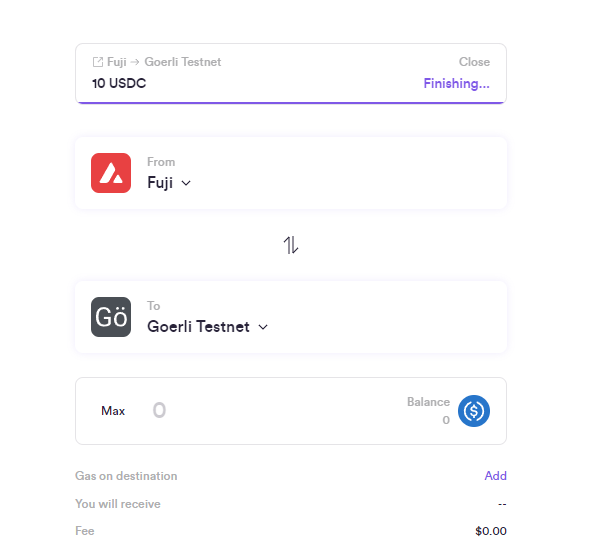
- With all that, visit LayerZero’s Testnet USDC Bridge https://usdcdemo.layerzero.network/bridge
- Bridge your USDC from Fuji to Goerli ETH.
- You can bridge back and forth a few times for good measure.
Strategy #10: Mint NFTs on Holograph and Bridge Them
Holograph is a platform that allows you to quickly deploy and mint your NFTs on Polygon, Avalanche, and Ethereum. Their bridge, powered by LayerZero, allows you to bridge minted NFTs from one chain to another.
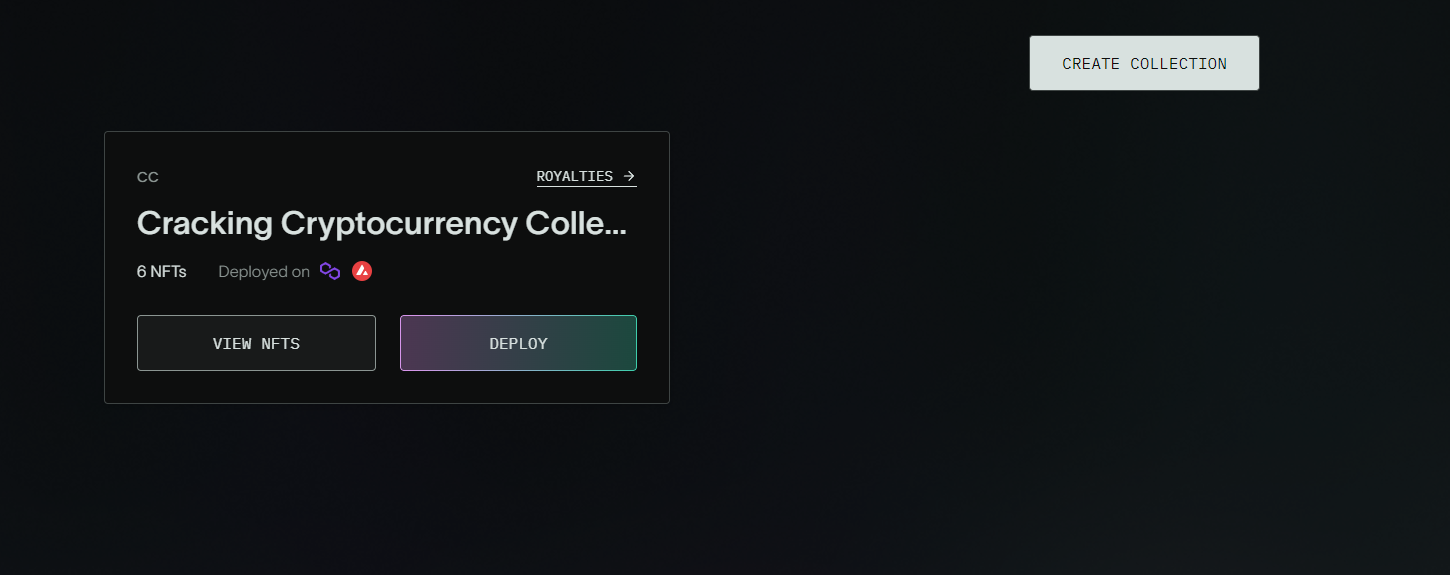
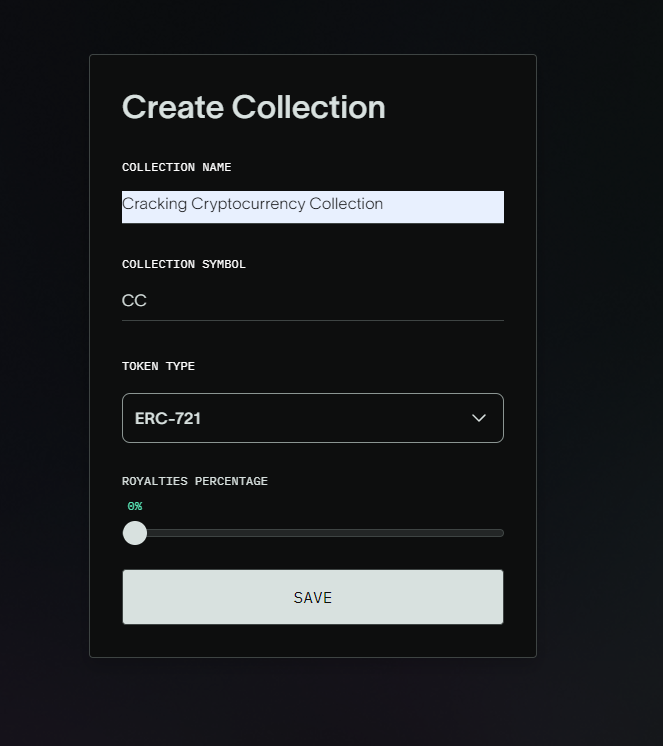
- Visit https://app.holograph.xyz/ and Create Collection
- Fill out whatever information you want and hit Save
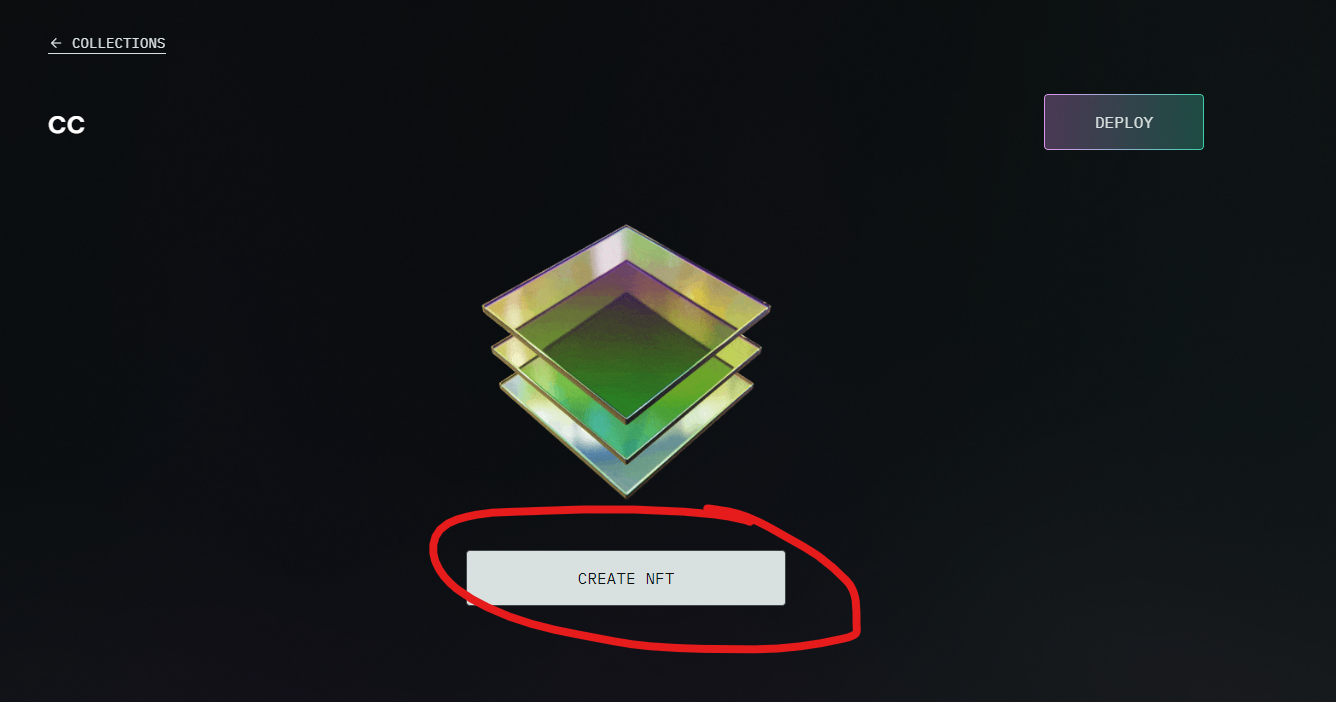
- Create some NFTs by uploading your photo file (make it fun!)
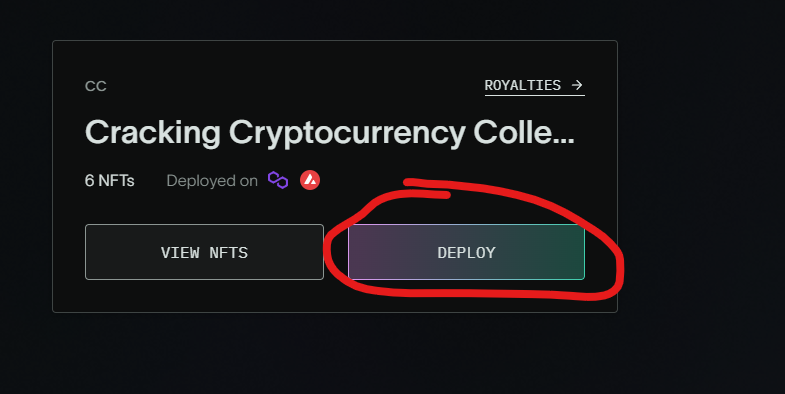
- Once you’ve created some NFTs, deploy them on Polygon
- Now go into your NFTs and mint them.
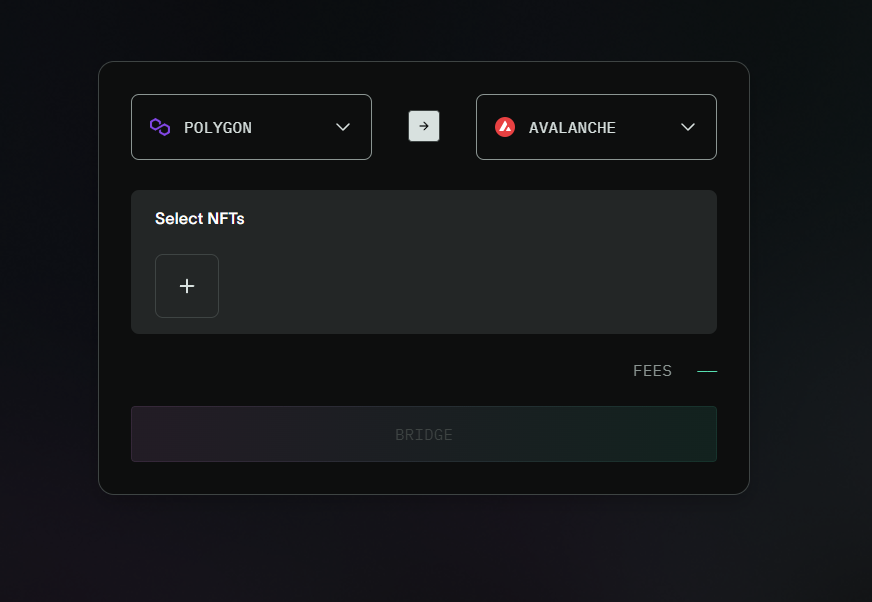
- Once minted, you can go to the bridge and bridge your NFTs from Polygon to Avalanche https://app.holograph.xyz/bridge
- You’ll need to deploy your Collection on Avalanche first.
Strategy #11: Swap on SushiX Swap
SushiSwap has integrated cross-chain swaps onto its platform powered by LayerZero technology. This means you can swap an asset on one chain for a different asset on another chain. Cool huh?!
The way I’ve written this guide is intended for you to use the funds that you bridged out of APTOS via LiquidSwap. Since that process will take up to three days, you could complete this step after doing all the initial steps in one day.
You can also use a separate source of funds if you’re eager just to knock it all out.
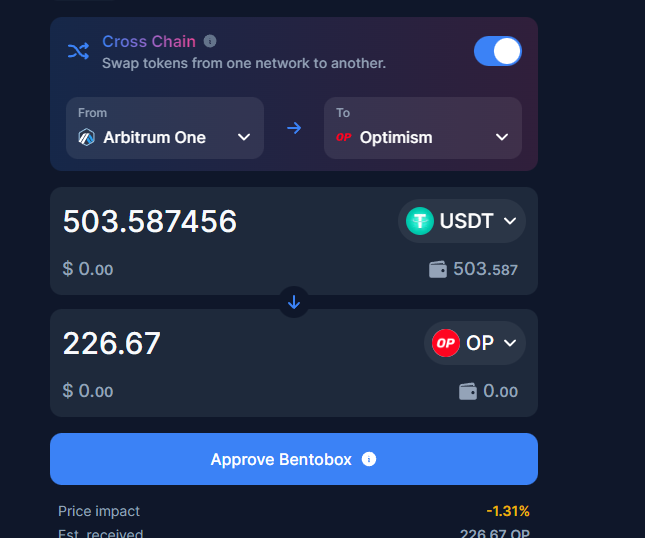
- Visit https://sushi.com/xswap
- Enable Cross Chain (see screenshot)
- Do some cross-chain swaps, converting your USDT into other low-price impact assets.
- When you’re all done, swap back into USDT on Arbitrum.
We’ll want to finish this step with our funds in USDT on Arbitrum.
Strategy #12: Deposit and Borrow on Radiant
Radiant is a cross-chain borrowing and lending platform leveraging LayerZero’s Stargate Protocol.
BONUS STRATEGY: Tapioca DAO
Tapioca DAO is a real omnichain money market; think of Radiant Capital but using LayerZero’s OFT instead of just Stargate Finance. They’re in beta on testnet, and their current beta round just closed, but keep your eyes open to interacting with this protocol for future tests.
https://www.tapioca.xyz/
Conclusion
Congratulations! You’ve done almost everything you could to qualify for the LayerZero $ZRO airdrop. Just kick back and wait for the Airdrop announcement.
While you're waiting, check out our free guide on 'The Five Mistakes Holding You Back From Profitable Trading.'


